Thursday, July 18, 2013

Office 365 – Using jQuery with SharePoint Online

Before we can use jQuery in our SharePoint web part we need to find a way to reference the library. There are a few options available to us, of which one is to simply add a reference to the script via a Content Delivery Network (CDN). In the example below we’re referencing the jQuery library via Google’s CDN:
<script src="https://ajax.googleapis.com/ajax/libs/jquery/1.7.1/jquery.min.js"  
type="text/javascript"></script> 
Using a content delivery network like Google’s is a great way to speed up your website as the chances are the user visiting your website has already visited a website that also references a library in the Google CDN and it is already in the users’ cache. To see a list of libraries available via the Google CDN, have a look at the Google Libraries API – Developer’s Guide.
Another option and the one we’ll be using for this example is to create a SharePoint document list to hold all your scripts. Create a new document library in SharePoint by selecting New Document Library from the Site Actions menu.
Creating a new document library in SharePoint
Name the library Scripts and click Create.
Giving a name to a new library
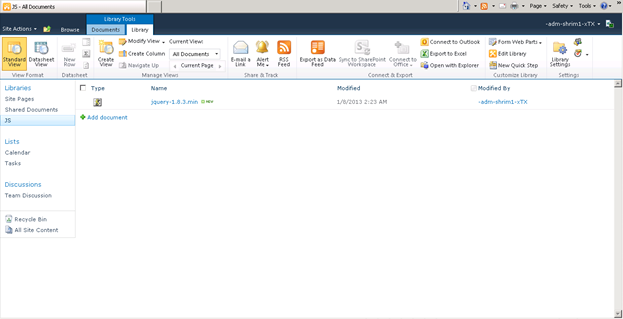
Next, we need to add the jQuery library file to the Scripts SharePoint library. Head over to http://jquery.com/ to download jQuery. Name the file jquery.js and upload it to the Scripts library. One benefit of storing your javascripts in a SharePoint list is that you can reuse it.
The nice thing about jQuery is that it has a whole host of community developed plug-ins, one of which is Hovercard. We’ll use this plugin to show more details about items in a SharePoint list called Books. Download Hovercard and also add it to the Scripts SharePoint library.

Creating the SharePoint WebPart

With the jQuery library and Hovercard plugin file uploaded, let’s create a new Empty SharePoint Project in Visual Studio 2010. Today we will not use the “ADX SharePoint Ribbon” project template because our Ribbon Designer for SharePoint and Office 365 would add a new SharePoint feature already containing ribbon while we need a new empty project.
Creating a new Empty SharePoint Project in Visual Studio 2010
Select a local SharePoint site for debugging and make sure to select Deploy as a sandboxed solution.
Deploying as a sandboxed solution
Next, add a Visual Web Part (Sandboxed) item to your project. If you don’t see the Web Part (Sandboxed) item, you need to install the Visual Studio 2010 SharePoint Power Tools.
Adding a Visual Web Part (Sandboxed) to your project
We won’t add any visual controls to our web part, but we’ll do everything in mark-up. The entire code listing for the Visual Web Part is as follows:
<%@ Assembly Name="$SharePoint.Project.AssemblyFullName$" %> 
<%@ Assembly Name="Microsoft.Web.CommandUI, Version=14.0.0.0, Culture=neutral, PublicKeyToken=71e9bce111e9429c" %> 
<%@ Register TagPrefix="SharePoint" Namespace="Microsoft.SharePoint.WebControls" 
    Assembly="Microsoft.SharePoint, Version=14.0.0.0, Culture=neutral, PublicKeyToken=71e9bce111e9429c" %> 
<%@ Register TagPrefix="Utilities" Namespace="Microsoft.SharePoint.Utilities" Assembly="Microsoft.SharePoint, Version=14.0.0.0, Culture=neutral, PublicKeyToken=71e9bce111e9429c" %> 
<%@ Import Namespace="Microsoft.SharePoint" %> 
<%@ Register TagPrefix="WebPartPages" Namespace="Microsoft.SharePoint.WebPartPages" 
    Assembly="Microsoft.SharePoint, Version=14.0.0.0, Culture=neutral, PublicKeyToken=71e9bce111e9429c" %> 
<%@ Control Language="C#" AutoEventWireup="true" CodeBehind="jQueryWebPart.ascx.cs" 
    Inherits="jQueryAndSP.jQueryWebPart.jQueryWebPart" %> 
<script src="../Scripts/jquery.js" type="text/javascript"></script> 
<script src="../Scripts/hovercard.js" type="text/javascript"></script> 
<h2> 
    Books</h2> 
<div id="books"
</div> 
<script type="text/javascript"
    ExecuteOrDelayUntilScriptLoaded(LoadList, "sp.js"); 
 
    function LoadList() { 
        var context = new SP.ClientContext.get_current(); 
        var web = context.get_web(); 
        var bookList = web.get_lists().getByTitle('Books'); 
 
        var query = SP.CamlQuery.createAllItemsQuery(); 
        allItems = bookList.getItems(query); 
        context.load(allItems, 'Include(Title,Synopsis)'); 
 
        context.executeQueryAsync(Function.createDelegate(this, this.ListRetrieved), Function.createDelegate(this, this.RetrievalFailed)); 
    } 
 
    function ListRetrieved() {   
        var listEnumerator = this.allItems.getEnumerator(); 
        var count = 1
 
        while (listEnumerator.moveNext()) { 
            var currentItem = listEnumerator.get_current(); 
            var id = 2
            var title = currentItem.get_item('Title'); 
            var synop = currentItem.get_item('Synopsis'); 
 
            $("#books").append('<div id="book-"' + count + ' class="book" title="' + synop + '">' + title + '</div><br/><br/>'); 
            count++; 
        } 
 
        $('.book').each(function () { 
            var synop = $(this).attr("title"); 
            $(this).hovercard({ 
                detailsHTML: "<div><p>" + synop + "</p></div>", 
                width:400 
            }); 
        }); 
    } 
 
    function RetrievalFailed(sender, args) { 
        alert("Could not retrieve list:" + args.get_message()); 
    } 
</script> 
In the code above we referenced the jQuery and the Hovercard files we’ve added to our Scripts document library earlier. The ExecuteOrDelayUntilScriptLoaded method is a built-in SharePoint method, which will execute the specified function only after, in this case the sp.js javascript file, is loaded. SP.js is a javascript library that gives us access to the SharePoint client object model.
The LoadList function retrieves all items from the Books SharePoint list and the ListRetrieved function loops through all the list items and appends the values, using jQuery, to the books Div.
Finally, we loop through each html element that has a class name containing the word book and add a Hovercard to it with the elements’ title attribute as the Hovercards’ detailsHTML.

Packaging and deploying to Office 365 SharePoint Online

Once everything is tested you can package the SharePoint solution by selecting Package from the Visual Studio Build menu. This will create a .wsp file in your projects’ bin folder. Check your Output window for the full path to the file if you’re not sure.
Packaging the SharePoint solution
Next, log into your Office 365 SharePoint Online account, and click on the Site Actions > Site Settings menu item.
Site Settings
Next, click on the Solutions link under the Galleries heading.
Click on the Solutions link under the Galleries heading.
Click on the Upload Solution button on the Solution tab:
Uploading the solution
Select and upload the .wsp file and click OK. When prompted activate your solution by clicking on the Activate button.
Activate your solution by clicking on the Activate button
Navigate to a SharePoint page, and insert the jQuery web part we’ve just uploaded.
Inserting the jQuery web part we've just uploaded
Once you’re finished editing the page, and the page loads, it will display a list of all the items in the SharePoint Books list. When you hover the mouse cursor over a book title it will display the books’ synopsis:
When you hover the mouse cursor over a book title the books' synopsis is displayed.
Happy coding!

Ajax-with SharePoint

JQuery integration with SharePoint Site collection

Following section describe how to do “hello world” code with JQuery and SP 2010. This is important as this is a must step for you to integrate any JQuery library, Plugins later.
1. Create Site collection, naming “JqueryDemo”.
2. Download the JQuery from Here. I have downloaded the “jquery-1.8.3.min.js” version of the file.
3. Once downloaded, add it SharePoint document library called “JS”. This library name can be can be anything based on your project requirements. All JavaScript files and related JQuery files are added here.

4. Create a text file called as “Include.txt”, which will have references to the JQuery file added above.
<html>
    <head>
        <script src="/sites/JQueryDemo/JS/jquery-1.8.3.min.js" type="text/javascript"></script>
    </head>
</html>
5. Add the “Incude.txt” file to “JS” document library created by above step. This can again be any of the folders within your share point. Make sure you know the relative path to the file.
6. For “Hello World” demo, let us include a below piece of code to a text file “QuerySharedDocuments.txt”.
    <html>
    <head>
        <script src="/sites/JQueryDemo/JS/jquery-1.8.3.min.js" type="text/javascript"></script>
        <script type="text/javascript">
            $(document).ready(function() {
                alert("Hello World");
            });
        </script>
    </head>
    <body>
    </body>
    </html>
7. Add the “QuerySharedDocuments.txt” file to “JS” document library
   
8. Create a new share point page called "JQueryTest”
9. Navigate to the “JQueryTest” page or navigate to a page where you want to test the above code.
10. Add a Content Editor Web Part.

11. Edit the web part to modify the content link to point to “/sites/JQueryDemo/JS/Include.txt”. This will ensure that required java scripts and JQuery files are referred in this page.
12. Title can be made blank for this content editor web part, as this will be used only for referencing the JQuery files.
13. Add another content editor web part below this and modify the content link to point to “/sites/JQueryDemo/JS /QuerySharedDocuments.txt”
14. Change the title of the content editor web part to “Shared Documents List”.
15. Save the page and run the page. Now it should display “Hello World” message as below.

16. Now that we have successfully done a “Hello world” Program of JQuery within SharePoint. Let us look at how to query a document library using JQuery.

2 Querying SharePoint Document Library

Following section will show how to query “Shared Documents” library through JQuery and render the contents in a tabular format. For this you can either call the List web service exposed by the SharePoint or you can use the JQuery library for SharePoint web services from here. I would prefer to go with the latter options, as it much more flexible and easy to write. You will need to download the latest JQuery file from here. I have downloaded “jquery.SPServices-0.7.2.js” version.
1. Add the file “jquery.SPServices-0.7.2.js” to “JS” document library created above.
2. Include following line of code in “Include.txt” and upload it to “JS” document library.
    <html>
        <head>
            <script src="/sites/JQueryDemo/JS/ jquery-1.8.3.min.js " type="text/javascript"></script>
            <script src="/sites/JQueryDemo/JS/jquery.SPServices-0.7.2.js" type="text/javascript"></script>
        </head>
    </html>
3. Modify the “QuerySharedDocuments.txt” to query the “Shared documents” document library and list all the items in a tabular format.
4. Add following html code to the between the body tag. This will be used to render the HTML on the client side.
   
<table id="documentListtable">
    <tr class="row-template">
        <td class="row-column">Document name </td>
        <td class="row-column">Author </td>
        <td class="row-column">Last Modified On </td>
        <td class="row-column">Doc type </td></tr>
</table>
<div id="templates"style="display: none">
    <table>
        <tr class="row-template">
            <td aligh="center"class="DocumentName" style="width: 100px;">
            </td><td class="Author"style="width: 100px;"></td>
            <td class="LastModifiedOn" style="width: 100px;"></td>
            <td class="Doctype" style="width: 100px;"></td>
        </tr>
    </table>;
</div>
5. under the div with id “templates” will be used to clone the rows. • Values for each column will be set dynamically by navigating through the document library XML received in JQuery. Once the values are set, they will be appended to the table with id “documentListtable”
6. Following code is used to fetch the list of documents and its associated attributes by querying the “Shared Documents” library.
• Operation: Which method to be executed in the List web service. Here “GetListItems” is used to get the items from list mentioned in “ListName” parameter.
• async: Should the method be called asynchronously or synchronously
• listName: List name. In this case it is “Shared documents”.
• Completefunc: Which method should be called on call back?
• CAMLRowLimit: no of rows that should be fetched.
    $(document).ready(function () { $().SPServices({ operation:"GetListItems", 
                                                     async: false, 
                                                     CAMLRowLimit: 5, 
                                                     listName: "Shared Documents", 
                                                     completefunc: fnCallBack 
                                }); });
    
7. Following section will explain on how the call back function will navigate through the xml and add rows to the “documentListtable” table. Below code is self-explanatory with inline comments.
    
        function fnCallBack(xData, Status) {
            var index = 0;
            $documentListtable = $("#documentListtable");
            //Navigate through the XML
            $(xData.responseXML).find("z\\:row, row").each(function () {

                //Get the values to a local variable
                var _url = $(this).attr("ows_FileRef").split(";#")[1];
                var _name = $(this).attr("ows_LinkFilename");
                var _pdfLink = $("<a href="http://www.codeproject.com/" + _url + "" rel="lightbox">" + _name + "</a>");
                var _author = $(this).attr("ows_Editor").split(";#")[1];
                var modifiedOn = $(this).attr("ows_Modified");
                var _DocIcon = $(this).attr("ows_DocIcon");

                //Create clone of the table row
                var $row = $("#templates").find(".row-template").clone();

                //Add values to the column based on the css class
                $row.find(".DocumentName").html(_pdfLink);
                $row.find(".Author").html(_author);
                $row.find(".LastModifiedOn").html(modifiedOn);
                $row.find(".Doctype").html(_DocIcon);

                //Change the style for even rows
                if (index % 2 == 0) {
                    $row.addClass("jtable-row-even")
                }
                index = index + 1;
                //add the row to table
                $documentListtable.append($row);
            });
        }

    
8. How is it rendered?
   
9. It is going to fetch only 5 rows as CAMLRowLimit is set to 5.
10. Style added in the “QuerySharedDocuments.txt” for providing alternate color to the table rows.
     
        <style>
        .row-template
        {
            background: rgb(248, 248, 248);
            padding: 2px;
            height: 30px;
        }
        
        .row-column
        {
            width: 150px;
            align: left;
            font-weight: bold;
        }
        
        .jtable-row-even
        {
            background: rgb(240, 240, 240);
        }
        </style> 

Sunday, July 14, 2013

jQuery snippets for SharePoint 2010

10 jQuery Snippets for SharePoint 2010

These snippets are all plugin independent and should be easy to follow and modify and they can be used in SharePoint Designer 2010, Visual Studio or be included in a text file in SharePoint linked from a content editor. Don’t forget to create a reference to the latest jQuery in the master page or into the text file.

1. Text manipulation

In this example I replace ‘All site content’ with the help of the each function.
2012-09-30-10jQuery-01.png

1/* --- Doc ready ---*/
2$(document).ready(function() {
3$('.ms-splinkbutton-text').each(function(i){ $(this).text($(this).text().replace('All Site Content','More stuff here..'))
4})

2. Check the URL

If the URL contains ‘news’, let’s do something conditionally with JS.

1if(document.URL.indexOf("news") != -1){
2alert("News site");
3} else{
4alert("Not the news site");
5}

Another way is to get a URL parameter and maybe their values and to something based on a condition with the help of jQuery. Let’s give the background different colors depending on if the views are sorted by Desc or Asc

01var url = window.location.href;
02/* --- Doc ready ---*/
03$(document).ready(function() {
04if (url.search("&SortDir=Asc") > 0) {
05$(".ms-viewheadertr").css('background-color','lime');
06};
07else if (url.search("&SortDir=Desc") > 0) {
08$(".ms-viewheadertr").css('background-color','yellow');
09};
10/* --- End doc ready ---*/
11});

3. Timestamp

If each page you create needs to have a unique name, you can set a time stamp when it is created. In this example I’ve used year to milliseconds and a random number at the end. This may be useful for a news site with many pages.
2012-09-30-10jQuery-02.png

01// create a timestamp with random
02var now = new Date();
03var year = now.getFullYear();
04var month = now.getMonth();
05var day = now.getDay();
06var hours = now.getHours();
07var minutes = now.getMinutes();
08var seconds = now.getSeconds();
09var milliseconds = now.getMilliseconds();
10var rand = Math.floor((Math.random()*1000000)+1);
11var pageID = ('ID-')
12var CustomInput = pageID + '' + year + '' + month + '' + day + '' + hours + '' + minutes + '' + seconds + '' + milliseconds + '' + rand;
13 
14/* --- Doc ready ---*/
15$(document).ready(function() {
16$("input[name='ctl00$PlaceHolderMain$nameInput']").val(CustomInput);
17/* --- End doc ready ---*/
18});

If you only want this function for let’s say a news site, you can use an If statement and identify the URL. But don’t forget that URL can be changed.

1/* --- Doc ready ---*/
2$(document).ready(function() {
3if(document.URL.indexOf("news") != -1) {
4// Unique page title
5$("input[name='ctl00$PlaceHolderMain$nameInput']").val(CustomInput);
6} else{}
7/* --- End doc ready ---*/
8});

4. Change the attribute

Let’s say you want to change, for example, the title tag for the ‘I Like It’ button; you can do this to set a custom attribute.
2012-09-30-10jQuery-03.png

1/* --- Doc ready ---*/
2$(document).ready(function() {
3$(".ms-socialNotif-Container > a").attr({
4title: "Click the button if you like this page",
5});
6/* --- End doc ready ---*/
7});

5. Change CSS

Let’s change the header text to red if the name is Link.

1/* --- Doc ready ---*/
2$(document).ready(function() {
3$(".ms-WPTitle span:contains('Links')").css("color", "red");
4});

Another way is to use a condition and a variable for this; if the web part header is equal to Shared Documents set the color to green, if the text is eq to Link set a border around the web part and set the text to red color. Normally I set the CSS into a CSS file, and you can use addClass to set the class as an option to set the CSS inline the script if you like.
2012-09-30-10jQuery-04.png

01/* --- Doc ready ---*/
02$(document).ready(function() {
03var WPtitle = $('.ms-WPTitle span');
04for (var i = 0; i <= WPtitle.length; i++) {
05if ($(WPtitle[i]).text() == 'Links') {
06$(WPtitle[i]).css({'color': 'red'});
07$(WPtitle[i]).parents().eq(10).css({'border': '1px black solid!important'});
08}
09else if ($(WPtitle[i]).text() == 'Shared Documents') {
10$(WPtitle[i]).css({'color': 'green'});
11}}
12/* --- End doc ready ---*/
13});

6. Add expand / collapse web parts

The following code will expand/collapse for all standard web parts.
2012-09-30-10jQuery-05.png

01/* --- Doc ready ---*/
02$(document).ready(function() {
03$(function($) {
04$('.s4-wpTopTable').find('tr:first h3').append('<a class=\'min\' style=\'float:left; margin-right:5px\'><img src=\'/_layouts/images/collapse.gif\'/></a>');
05var Collapse = "/_layouts/images/collapse.gif";
06var Expand = "/_layouts/images/expand.gif";
07$('.min').click(function(){     
08var img = $(this).children();
09$(this).closest('.s4-wpTopTable').find('tr:first').next().toggle().is(":visible") ? img.attr('src',Collapse) : img.attr('src',Expand );
10});
11});
12});

7. Modify form field

jQuery can be used in many ways for standard list forms in SharePoint. This fist example shows how to set read only, a color and a specific width for the title field in edit mode.
2012-09-30-10jQuery-06.png

1/* --- Doc ready ---*/
2$(document).ready(function() {
3$("input[title='Title']").attr("readonly","true").css('background-color','#ccc').width(70);
4/* --- End doc ready ---*/
5});

The next example shows how to set a field limit and add a counter that shows the number of characters left
2012-09-30-10jQuery-07.png

01// Show Nr of Characters left in a common list field
02(function($){ 
03$.fn.fieldLimit = function(options) { 
04return this.each(function() { 
05var characters = 30;
06$(this).keyup(function(){
07if($(this).val().length > characters){
08$(this).val($(this).val().substr(0, characters));
09}  
10var remaining = characters - $(this).val().length;
11$(options.result).html(remaining + " characters left");        
12});
13}); 
14}; 
15})(jQuery);
16 
17/* --- Doc ready ---*/
18$(document).ready(function() {
19$('.ms-formtable').prepend("<div class='CharactersLeft'></div>");
20$('input[title$=Title]').fieldLimit({
21result:".CharactersLeft",
22});
23/* --- End doc ready ---*/
24});

8. Check site template

If you need to do something based on which site template a site has been created from, you can identify this with the help of the site template ID. I have only covered a few templates below.

01/* --- Doc ready ---*/
02$(document).ready(function(){
03CurrentTemplate = g_wsaSiteTemplateId;
04TeamSite = 'STS#0'
05EnterpriseWiki = 'ENTERWIKI#0';
06PublishingSite = 'CMSPUBLISHING#0';
07if (CurrentTemplate == TeamSite){
08alert('Im a Team site');}
09else if (CurrentTemplate == EnterpriseWiki){
10alert('Im a Enterprise Wiki');}
11else if (CurrentTemplate == PublishingSite){
12alert('Im a Publishing Site');}
13else {
14alert('Sitetemplate not defined yet..');}
15/* --- End doc ready ---*/
16});

9. Welcome message

This example shows how to work with variables. You’ll also find some plain old good JS date stuff that can be useful when you need to check times.
2012-09-30-10jQuery-08.png

01/* --- Doc ready ---*/
02$(document).ready(function(){
03var WelcomeMenuContent = $('.ms-welcomeMenu > a.ms-menu-a > span');
04var UserName = WelcomeMenuContent.text();
05var FirstName = UserName.split(" ")[0];
06var Display;
07var Digital = new Date()
08var Hours = Digital.getHours()
09Morning = 'Good morning' + " " + FirstName;
10Lunch = 'Lunch time' + " " + FirstName;
11Evening = 'Good evening' + " " + FirstName;
12Night = 'Time to go home' + " " + FirstName;
13TimeElse = 'Welcome' + " " + FirstName;
14if (Hours >= 5 && Hours <= 11)
15WelcomeMenuContent.text(Morning);
16else if (Hours == 12)
17WelcomeMenuContent.text(Lunch);
18else if (Hours >= 13 && Hours <= 17)
19WelcomeMenuContent.text(Evening);
20else if (Hours >= 18 && Hours <= 23)
21WelcomeMenuContent.text(Night);
22else
23WelcomeMenuContent.text(TimeElse); 
24/* --- End doc ready ---*/
25});

10. Append today’s date

While we’re talking about get date with JS, let’s see how you can use this to display the current date somewhere on the page like this.
2012-09-30-10jQuery-09.png

1var d = new Date();
2var month = d.getMonth();
3var date = d.getDate();
4var year = d.getFullYear();
5/* --- Doc ready ---*/
6$(document).ready(function() {
7$('.s4-pagedescription').append("<div style='float:right'>" + month + "/" + date + "/" + year + "</div>");
8});

Use jQuery & cookies in SharePoint 2010

In this blog article I’ll show you how to use Cookies in jQuery for your SharePoint Designer 2010 no code applications.
With help of a cookie you can write information to the user’s computer and this can be useful if you need to store stuff like visitors preferences, for example if the user has checked a check box or not at some page. Cookies can be very useful in many ways, but in some situations you need to write such information to the server like a database instead, cookies should not be used for critical information or any kind of sensitive information especially at a public faced site. However a cookie can be a great choice for many tasks in your front end development.
Some examples of the usefulness of a cookie
  • Change color schemes
  • Hide / Show elements at the page
  • Resizing fonts, scale up or down
  • Form, auto save inputs in fields, selected check box or radio button
  • Accordion / tabs, remember last state of collapsed/opened
  • Navigation, remember the last location
  • Welcome message, for example if you want to show a popup only once at specific date at the start page.
jQuery doesn’t support cookies natively but you can use a super small plugin called ‘jquery.cookie.js’  that contains all kind of basic functions and options you’ll need for your scripting. This plugin is also included in jQuery UI development-bundle.
Jquery.cookies gives a couple of options like:
  • Expires
    The lifetime for the cookie. You can use a number of days or a specific date. If omitted, the cookie is a session cookie
  • Path
    Where the cookie is valid. If you want it to be valid at every site in the site collection, just use a slash /, if you want it to be valid at let’s say only the news site set e.g /news/

Get going

Let’s start with a simple example just to get going, the following example will set the top row to a red or green background color depending of which link you click. Let’s say you clicked at green one and then reload the page, the green background color will remain. If you restart the browser, the top row will be white again. This script do not have any expired date, therefore, the cookie will expire automatically when you close the browser.
Let’s try this out:
Download jquery.cookies.js and create a reference to this file in your custom master, don’t forget to include an reference to latest jQuery API as well.
HTML
Put this somewhere in your custom master page
1
2
3
4
5
6
<!-- Session -->
<div class="Wrapper">
    <div class="Red">Red</div>
    <div class="Pipe">|</div>
    <div class="Green">Green</div>
</div>
jQuery
Put this in an external JS file referenced from your master page
1
2
3
4
5
6
7
8
9
10
11
12
13
14
15
16
17
18
19
20
21
22
23
24
$(document).ready(function() {
 
// Click red
$('.Red').click(function() {
$('.Wrapper').css("background-color","red");
$.cookie('Wrapper', 'red');
});
 
// Click green
$('.Green').click(function() {
$('.Wrapper').css("background-color","green");
$.cookie('Wrapper', 'green');
});
 
// Cookies
var Wrapper = $.cookie('Wrapper');
if (Wrapper == 'red') {
$('.Wrapper').css("background-color","red");
};
if (Wrapper == 'green') {
$('.Wrapper').css("background-color","green");
};
 
});
CSS
Put this in an external CSS file referenced from your master page
1
2
3
4
5
6
7
8
9
10
11
12
13
14
.Wrapper{
width:100%;height:16px;
background-color:#fff;color:#000;
}
.Red{
cursor:pointer;padding-left:5px;
float:left;
}
.Green{
cursor:pointer;float:left;
}
.Pipe{
float:left;padding:0px 5px 0px 5px
}
Maybe you want to set the cookie to a life span of 2 days, take a look at the jQuery script and the part where you set the name and the property:
1
$.cookie('Wrapper-', 'Green-');
Just add a path and a value; a number or a specific date, this will create the cookie
1
$.cookie('Wrapper-', 'Green-', {path: '/', expires: 2});
Take a look at the cookie in your disk, if you are using IE, you will find it through this path
1
C:\Users\...\AppData\Local\Microsoft\Windows\Temporary Internet Files
The file will contain the name of the cookie, the property and the path like this
1
Wrapper-Green-ecmtest67/108815182001923024639810215318430245996*

How to use cookies in a Data View web part

If we take this a step further and try to use cookies in a typical news roller DVWP. In this example, If you click at the icon next to the header for a news item that section will disappear, a kind of ‘I Have Read This’ function. At the bottom of the web part there’s a reset link that will delete the cookie.

The HTML part of the DVWP, it’s important to use @ID for the id, classes and href as the script shows
1
2
3
4
5
6
7
8
9
10
11
12
13
14
15
16
17
18
19
<div class="NewsRow {@ID}">
<div class="NewsContentContainer">           
<div class="NewsTitle">
<div class="NewsHider"><a href="{@ID}" id="{@ID}"><img alt="" src="/Style%20Library/Custom/Images/IhaveReadThis.png" width="22" height="22" /></a></div>
<div class="NewsTitleInner"><a href="/news/Pages/{@LinkFilename}"><xsl:value-of select="@Title" /></a></div>
<div class="GeneralClearBoth"></div>
</div>       
</div>
<div class="NewsAuthorCreatedWrap">
<span class="NewsAuthor">By <xsl:value-of select="@PublishingContact.title" />,</span> <span class="NewsCreated"><xsl:value-of select="@ArticleStartDate" /></span>
</div>
<div class="NewsContent">
<xsl:call-template name="FirstNWords">
<xsl:with-param name="TextData" select="$DescText"/>
<xsl:with-param name="WordCount" select="15"/>
<xsl:with-param name="MoreText" select="'...'"/>
</xsl:call-template>
</div>
</div>
The jQuery goes here
1
2
3
4
5
6
7
8
9
10
11
12
13
14
15
16
17
18
19
20
21
jQuery(function ($) {
var removedLinks = 'removedLinks'
,Options = {
expires: 7,
path: '/news'
},
c=$.cookie(removedLinks)||'#DebuggingCode'
$(c).remove();
$(".NewsHider a").click(function (e) {
e.preventDefault();
var LinkClass = '.'+ $(this).attr('id'),
removeLinksClasses=c.split(',')
$(LinkClass).remove()
removeLinksClasses.push(LinkClass)
c=removeLinksClasses.join(',')
$.cookie(removedLinks, c, Options)
});
$('#NewsResetCookie').click(function(){
$.cookie(removedLinks,'',{expires:-1,path:'/news'})
})
});
If you prefer to use this in the ItemStyle.xsl and use it as a format for the Content Query web part, it works fine as well.